
ESP32/Arduino Sensor Data Visualization on Web Apps: A Beginner's Guide with Directus: Part 1
With over a decade of hands-on experience, I specialize in building robust web applications and scalable software solutions. My expertise spans across cutting-edge frameworks and technologies, including Node.js, React, Angular, Vue.js, and Laravel. I also delve into hardware integration with ESP32 and Arduino, creating IoT solutions.
Ever wanted to build a project that bridges the physical world with the web, but coding a web application seems daunting? This guide is for you! We'll embark on a journey to create a system that collects sensor data and displays it on a user-friendly web interface – without writing any code for the web app itself.
Our secret weapon? Directus, a powerful open-source platform that acts as a bridge between your data and web applications. Directus takes care of storing and managing sensor readings, eliminating the need for complex back-end coding. It even automatically generates APIs for your data, making it accessible to your project with ease.
This project is perfect for beginners interested in working with real-world sensors and visualizing data on the web. Let's dive in!
To get started:
We'll use an ESP32 microcontroller to grab data from a sensor.
The sensor, in this case, will be a DHT11, measuring both temperature and humidity.
Nodejs ( We'll talk about it later)
What you'll need:
ESP32 development board
DHT11 sensor
Breadboard and jumper wires
Let's embark on this journey!
1. Building the Circuit
First, we need to build the circuit that connects your ESP32 to the DHT11 sensor. Here's what you'll do:

1.2 Coding part
Now that you have your ESP32 circuit built, it's time to write the code that will interact with the sensor and verify its functionality. This code will be uploaded to your ESP32 board.
Here's a breakdown of the code and its explanation:
1. Libraries and Pin Definition:
#include "DHT.h"
#define TYPE DHT11
int sensePin = 2;
#include "DHT.h": This line includes the DHT library, which provides functions for communicating with DHT sensors like the DHT11.#define TYPE DHT11: This line defines the type of sensor you're using. In this case, we're specifying DHT11.int sensePin = 2;: This line declares a variable namedsensePinand assigns it the value2. This variable stores the pin number on your ESP32 that is connected to the data pin of the DHT11 sensor. You might need to adjust this value depending on your specific circuit wiring.
2. Object Creation and Setup:
DHT HT(sensePin, TYPE);
void setup() {
 Serial.begin(9600);
 HT.begin();
}
DHT HT(sensePin, TYPE);: This line creates an object namedHTof typeDHT. It provides methods to interact with the sensor connected to thesensePin. We're passing the previously definedsensePinvariable and the sensor type (DHT11) to the constructor.void setup(): This function runs once when the ESP32 starts up. Inside the setup function:Serial.begin(9600);: This line initializes the serial communication between the ESP32 and your computer at a baud rate of 9600. This allows you to see the sensor readings printed on your computer screen.HT.begin();: This line calls thebegin()method of theHTobject. This method initializes the communication with the DHT11 sensor and performs a check to ensure proper connection and functionality.
3. Reading Sensor Data and Printing to Serial Monitor:
void loop() {
 humidity = HT.readHumidity();
 tempC = HT.readTemperature();

 Serial.print("Humidity: ");
 Serial.println(humidity);
 Serial.print("Temperature C: ");
 Serial.println(tempC);

 delay(setTime);
}
void loop(): This function runs repeatedly after thesetup()function finishes. This is where the actual sensor data reading and processing happen.humidity = HT.readHumidity();: This line calls thereadHumidity()method of theHTobject. This method reads the humidity value from the DHT11 sensor and stores it in thehumidityvariable.tempC = HT.readTemperature();: This line calls thereadTemperature()method of theHTobject. This method reads the temperature in Celsius from the DHT11 sensor and stores it in thetempCvariable. There's also areadTemperature(false)method that reads the temperature in Fahrenheit, but we're using Celsius in this example.Serial.print("Humidity: ");andSerial.println(humidity);: These lines print a message "Humidity: " to the serial monitor followed by the actual humidity value read from the sensor. Theprintln()function adds a new line character after printing.Serial.print("Temperature C: ");andSerial.println(tempC);: These lines print a message "Temperature C: " to the serial monitor followed by the temperature in Celsius read from the sensor.delay(setTime);: This line pauses the program execution for the specified time in milliseconds. ThesetTimevariable is set to 500 milliseconds (half a second) in this example, which means the sensor readings will be printed every half second. You can adjust this value to control how often the readings are printed.
You find the code here: esp32-directus
2.Setting Up the Web Environment (Directus)
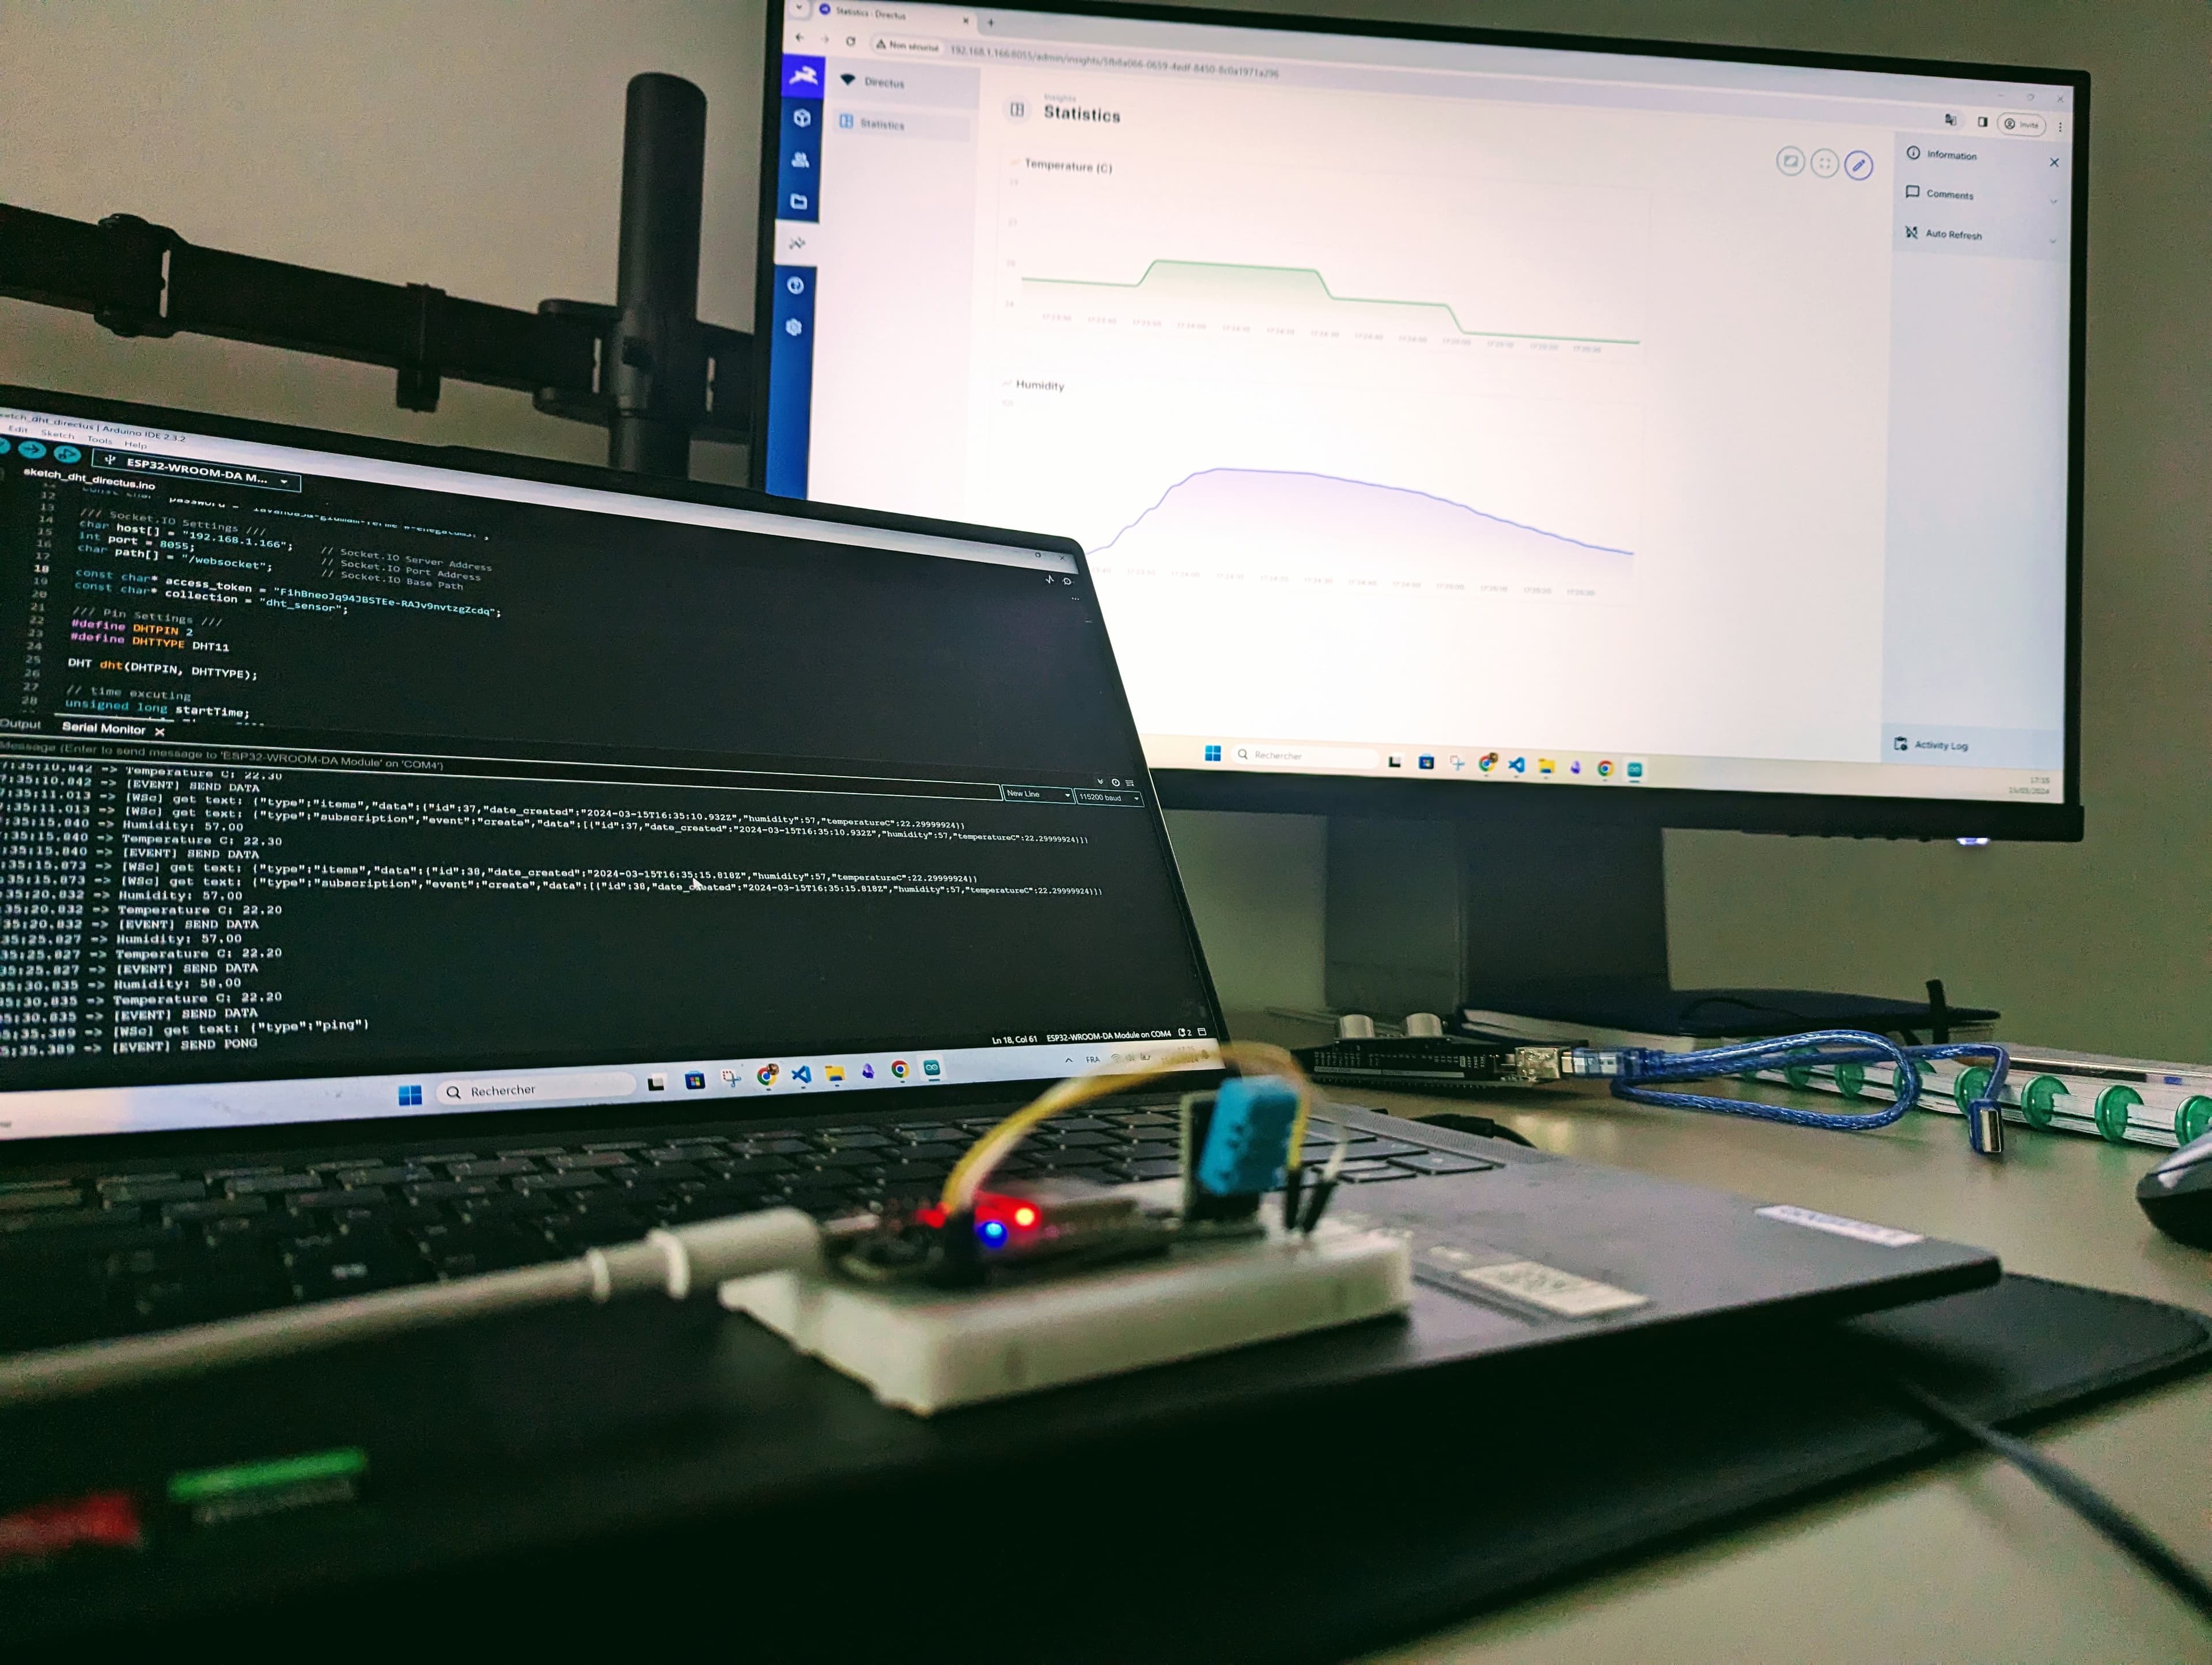
Now that you've verified your ESP32 circuit and sensor functionality, let's prepare the web environment to receive and visualize that data! Here, we'll leverage the power of Directus.
What is Directus?
Directus is an open-source data platform that acts as a bridge between your databases and web applications. It offers a user-friendly interface to:
Store and Manage Data: Directus eliminates the need for complex back-end coding. It allows you to create data models (like tables) and manage sensor readings efficiently.
Build APIs in Minutes: Directus automatically generates RESTful APIs for your data, making it accessible to your ESP32 code or any web application for seamless data exchange. moreover, it provides a socket connection (that we will use in our project to send the data)
Beautiful User Interface: Directus provides a clean and intuitive web interface for users to view, edit, and even filter sensor data. Imagine viewing real-time temperature and humidity readings from your web browser!
In essence, Directus acts as the central hub for your sensor data, streamlining the process of storing, managing, and ultimately visualizing it on a web application.
Here's a breakdown of how we'll use Directus:
Installation: We'll install Directus using Node.js, a popular tool for building web applications. Don't worry if you haven't used Node.js before - we'll walk you through the simple installation process.
Project Creation: We'll create a new Directus project specifically for your sensor data. Think of it as a dedicated space within Directus to manage data from your ESP32.
Collection: We'll define a data table within your Directus project. This table will have columns to store the sensor readings (humidity and temperature) received from your ESP32.
2.1 Setting Up the Environment (Node.js)
To install Directus, we need Node.js on our computer. It's a free and easy download. Here's how to get it:
Head over to the official Node.js website: https://nodejs.org/en.
Download the installer suitable for your operating system (Windows, Mac, or Linux).
Run the downloaded installer and follow the on-screen instructions.
Once Node.js is installed, you can verify it by opening a command prompt (Command Prompt on Windows, Terminal on Mac/Linux) and typing:
node -v
This should display the installed Node.js version. Now you're ready to use Node.js for setting up Directus!
2.2 Install Directus: Your Data Management Hub
Now that you have Node.js set up, it's time to install Directus! Think of Directus as a central hub where all your sensor data will be stored and organized. Here's how to install it with ease:
1. Open your Command Prompt (Windows) or Terminal (Mac/Linux):
You'll use the command prompt to interact with Node.js and install Directus.
2. Navigate to your project folder (optional):
If you're working within a specific folder for this project, use the cd command to navigate to that directory. For example, if your project folder is named "web_project", you'd type:
cd web_project
3. Run the installation command:
Here's the magic spell (command) to install Directus:
npm init directus-project@latest <project-name>
Replace<project-name> with your desired name for this project. For instance, you could name it "sensor_app". So, the complete command would look like:
npm init directus-project@latest sensor_app
Hit Enter! This command will download and install all the necessary files for Directus within your project folder.
4. Follow the interactive setup:
Once you run the installation command, Directus will ask you a few questions to configure your project. Here's what to expect:
Choose your database client: Select "SQLite" as it doesn't require separate installation.
Database File Path: Press Enter to accept the default path within your project folder.
Create your first admin user: Enter a valid email address
Enter your password: Create a password for your Directus admin account.
That's it! Directus is now installed and ready to be configured. We'll explore setting up your Directus project and creating a data table for your sensor readings in the next steps.
IP Configuration:
we need to configure Directus to receive data from your ESP32. Here's how:
Find your IP address: Open a command prompt and type
ipconfig(Windows) orifconfig(Linux). Locate the "IPv4 Address" section and copy the IP address displayed.Modify the
.envfile: In your project folder, locate a file named ".env". Open it with a text editor.Change the HOST: Find the line that reads
HOST="0.0.0.0"and replace it withHOST="<YOUR_IP>". Replace "<YOUR_IP>" with the actual IP address you copied in the previous step.Add new parameter:
WEBSOCKETS_ENABLED=true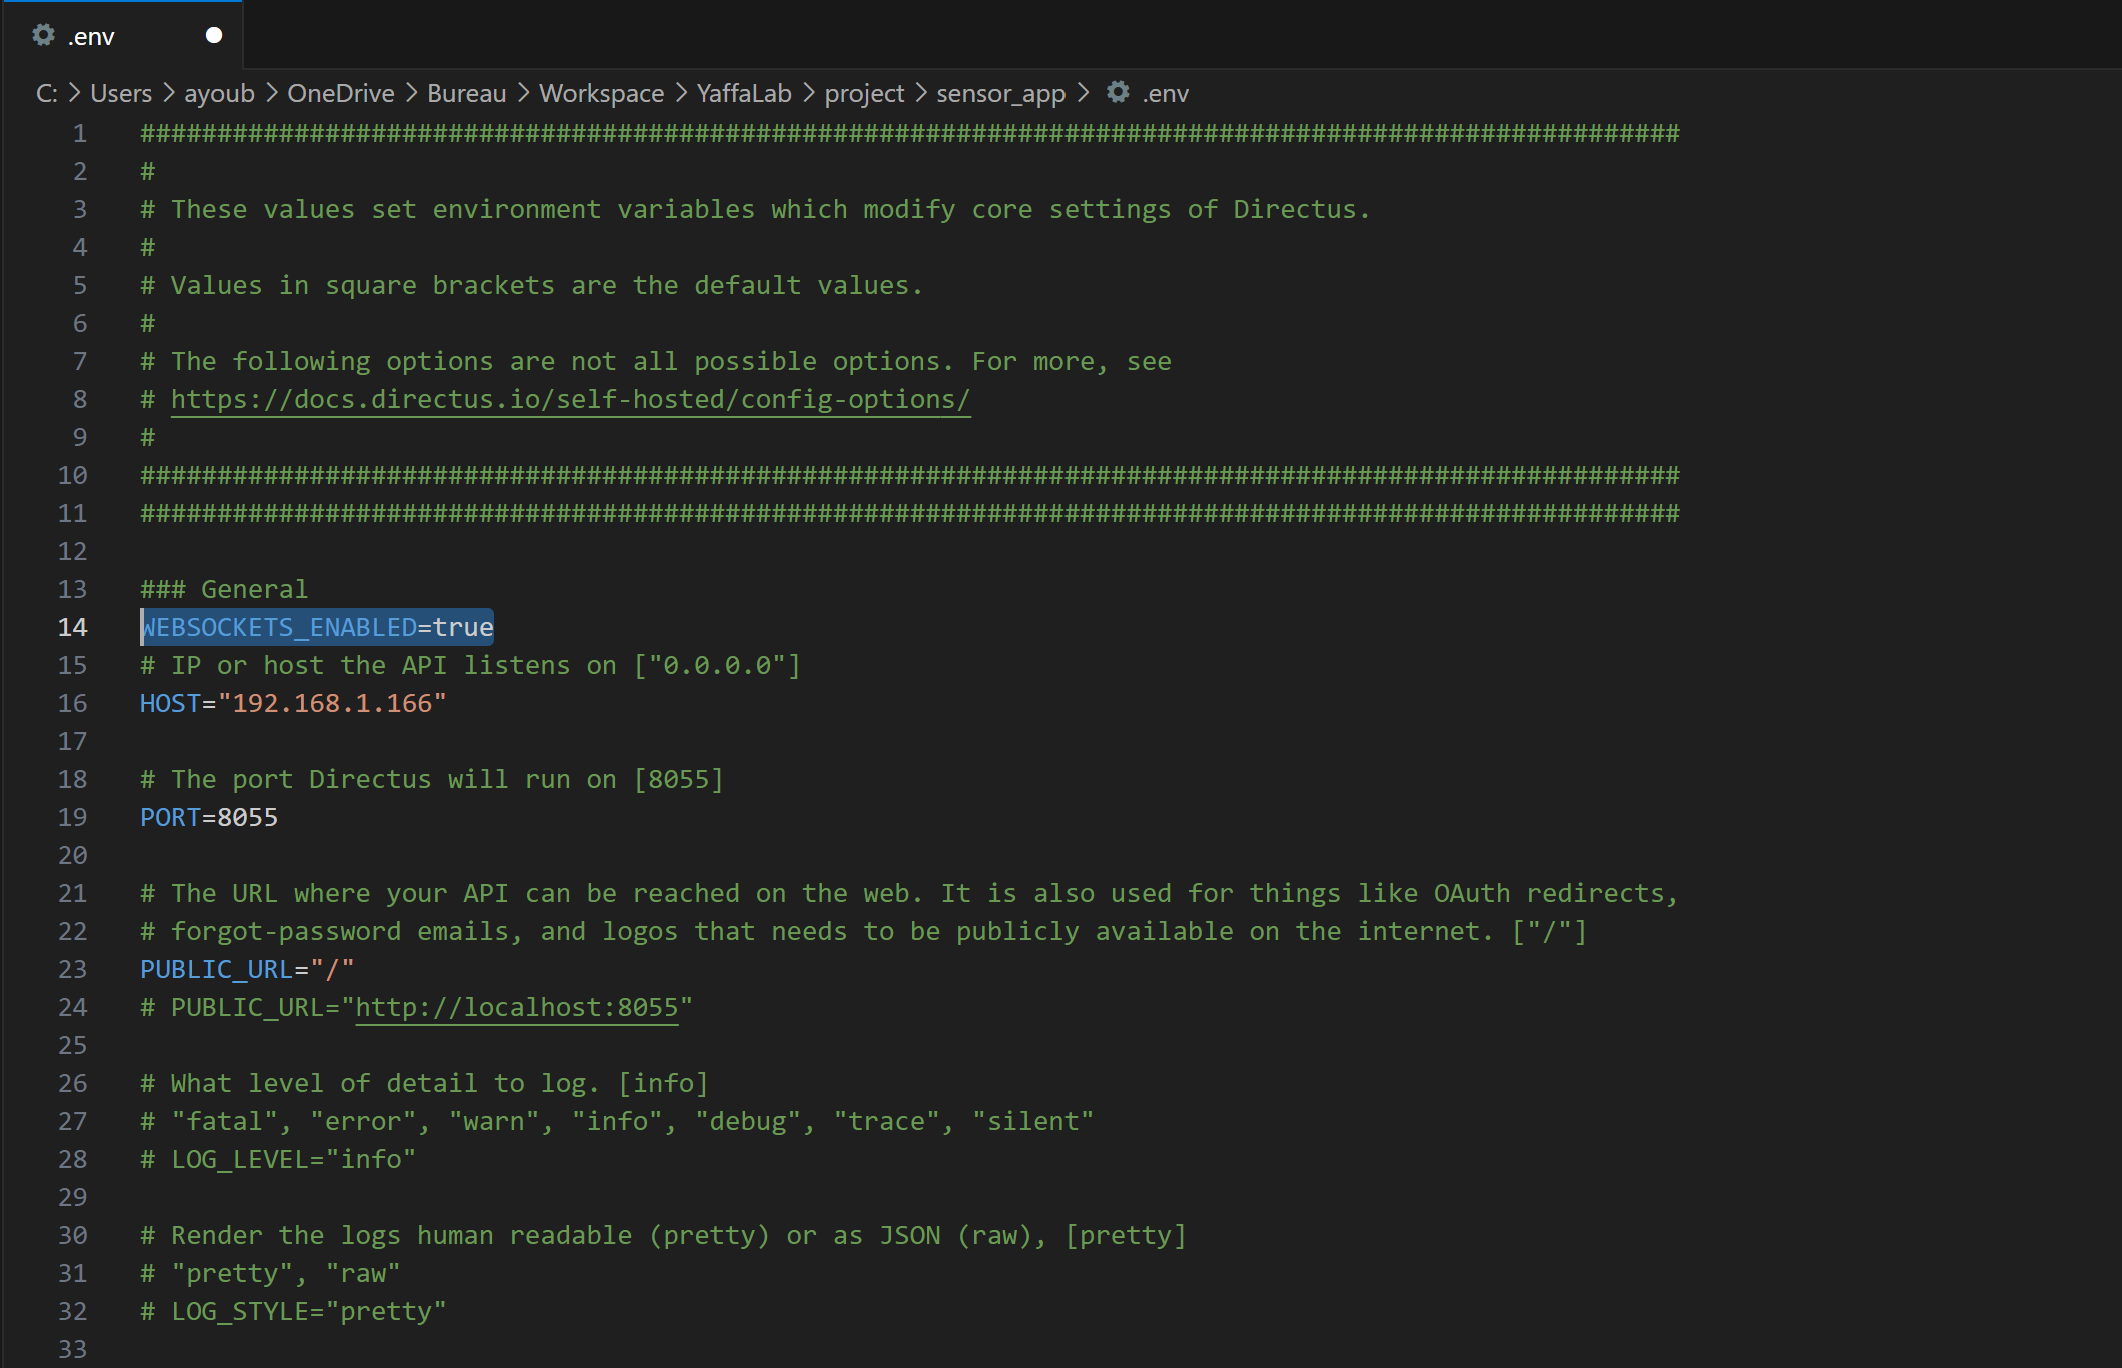
Save the changes.
Start the Directus application:
Navigate back to your project folder in the command prompt and run the following command:
npx directus start
This will start the Directus application. You can now access the Directus interface in your web browser by visiting http://<YOUR_IP>:8055.
3. Setting Up Data Collection and Users
Now that Directus is installed and running, let's configure it to manage your sensor data:
3.1 Create a Collection (Table)
Create Collection: Click on "Create Collection" in the Directus interface.
Name the Collection: In the pop-up window, enter a name for your collection. Let's call it "dht_sensor". This will be the table where your sensor readings (humidity and temperature) will be stored.
Define Fields: Click "Next" and select created_at and let other optional fields untouched for now.
Add Fields for Sensor Data: Click "Add Field". Choose "Input" for the field & Float as the type.
Humidity Field: Name the field "humidity" (all lowercase for consistency). Click "Finish".
Temperature Field: Repeat the above process to create another field named "temperatureC".
Tip: You can refer to the provided video for a visual reference on these steps.
3.2 Create a User
While you can use your existing login to create the collection, creating a dedicated user for your ESP32 offers some benefits:
Security: It keeps data originating from the ESP32 separate from your admin account.
Access Control: You can restrict this user's access to specific functionalities in the future (advanced topic).
To create a user:
Navigate to Users: Click on the "Users" icon (second button on the menu bar).
Create a User: Click the "Create Item" button (top right corner).
Fill User Details: Enter a name, email address, and a strong password for this user.
Assign Role: Scroll down and select the "Administrator" role.
Generate an API Token: Click on "Generate Token" and save the generated token securely. You'll need this token in your ESP32 code to send data to Directus.
Congratulations! You've successfully set up Directus to store your sensor data. In the next article, we'll explore how to send data from your ESP32 to this Directus application and visualize the readings in charts!